Most ping pong table setups fail in the first hour, before anyone has played a point. I have watched a family wrestle a folding table out of a box, tighten every bolt in the order the pictures showed, drop it in a garage with a two-inch slope, and then wonder for two years why every ball breaks in the same direction.
I run a community table tennis club in a converted warehouse in Milwaukee with six tables, and I have assembled, leveled, re-squared, and repaired far more than that. The table itself is maybe 10% of your problem. The other 90% is the floor under it, the frame bolts you tightened too early, and the folding hardware nobody lubricates until it seizes. A proper ping pong table setup is mostly about the boring steps people skip.
This is the procedure I use, in order, on any table that comes through the club doors. It takes about 90 minutes the first time and about 10 minutes a month after that.
Why you should trust me
I have been around table tennis since I was a teenager in the Czech Republic, and I now run a community club out of a converted warehouse in Milwaukee. Six tables sit on that floor, four of them bought used, two of them assembled by me from a flat box at 11 at night. I keep a carpenter's square and a drop ball in the same drawer as the spare net clamps, because those two tools settle more arguments than any spec sheet.
I measure tables the way I was taught: drop a ball from 30 cm at nine points, write down what comes back, and look at the spread. I have fixed around 40 folding mechanisms, most of them ruined by the same two mistakes, which are folding the table with the net attached and never touching the hinges until they seized. I do not review paddles, because that is a different specialty with different materials, and I do not pretend a patio table plays like a club table.
How I picked what's in this guide
This is a setup guide, not a shootout, so the short list is deliberately short: the thing you play on, and the thing that keeps it clean when you are not playing. The criteria are the same ones I use when a family asks me what to buy.
Bounce consistency comes first. Not thickness, not the badge on the frame. A table that returns the ball at the same height at all nine points is playable. A table that returns it high at one corner and low at the other will teach your kid to compensate for a defect instead of learning a stroke.
Second, the folding hardware. I look at how the hinge plates are attached, whether the locks are metal, and whether the casters lock. If the table walks across the floor when someone leans on it, the setup has already failed.
Third, the surface and where it lives. An indoor table under a leaky garage ceiling and an outdoor table on a patio are different products with different problems, and the setup procedure has to respect that difference.
Then I looked at what actually addresses those three things for a home buyer, and two items came out of that list.
The two purchases that decide the setup
You cannot square a frame that arrived bent, and you cannot keep a surface consistent if grit is grinding into the paint every week. These are the two pieces of gear that carry the most weight in a home setup.
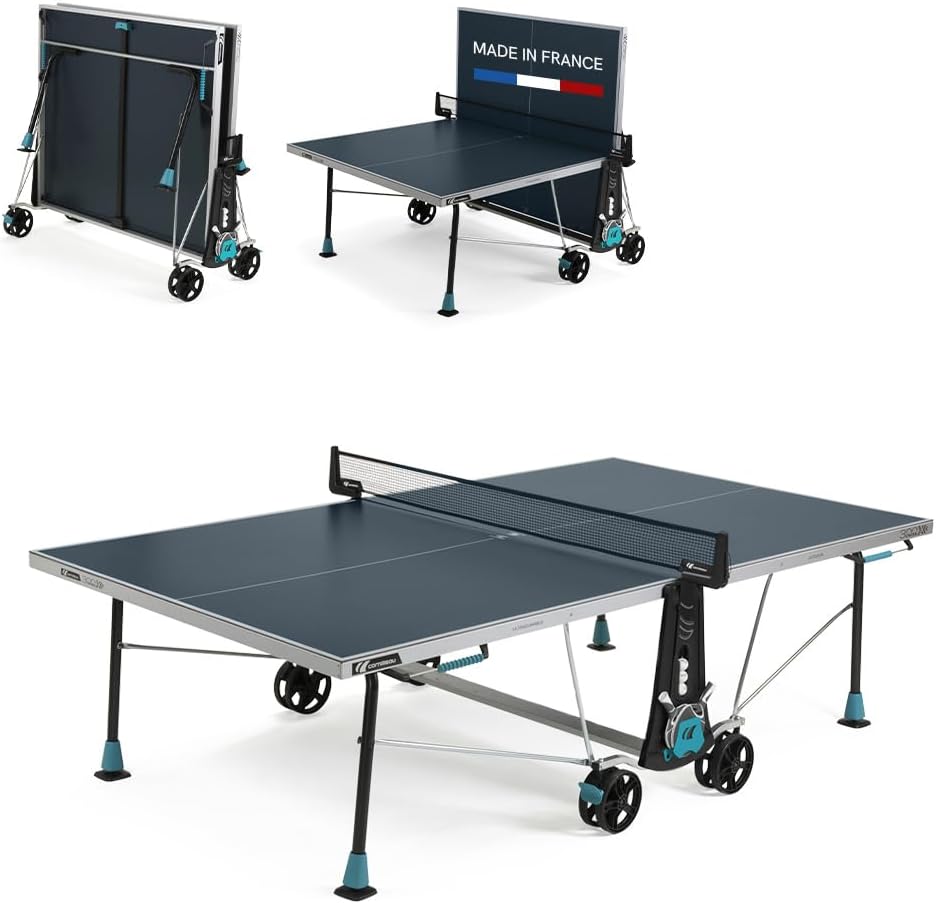
The outdoor pick: CORNILLEAU - 300X Outdoor Table Tennis Table
 Visit on Amazon →
This is the one I point at when the table is going to live outside. The surface is 5mm and weatherproofed, with an anti-glare coating on top, which matters more than people expect on a sunny patio where a glossy top turns into a mirror by mid-afternoon. It folds compactly, so it can go against a wall when the season ends, and there is storage on the table for paddles and balls, which solves the problem of balls migrating into the grass.
Be honest with yourself about what a 5mm weatherproof top is. It is built to survive rain, sun, and temperature swings, and the trade-off is a slower, deader bounce than the 19mm tops in my club. That is not a defect, it is the material science of an outdoor table. If your goal is patio rallies with the family, this class of table is the right answer. If your goal is a junior practicing for tournaments, read the bounce test section carefully, because you will need to adjust expectations and eventually add an indoor table.
Flaws but not dealbreakers: An outdoor table still needs a level slab under it. No table levels itself on a patio that drains toward the house.
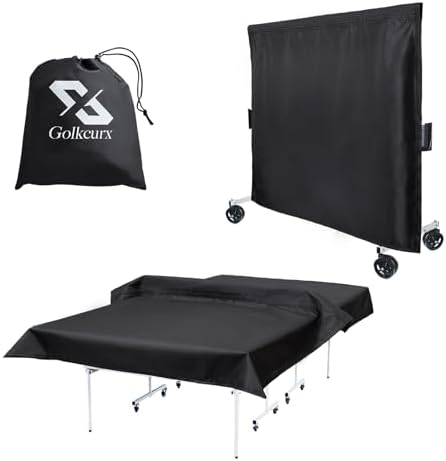
The protection pick: Golkcurx Indoor Ping Pong Table Cover
 Visit on Amazon →
Dust is the quiet killer of bounce consistency. Grit settles on the surface, balls grind it into the paint, and two years later the worn spots return the ball differently from the rest of the table. This cover is water resistant and sized for a universal 9x5 ft table, so it fits the standard footprint most home tables share, whether you store yours folded or set up.
Measure before you order. Measure your table folded, measure it set up, and measure the height with the net on if you plan to leave the net attached. A cover that is too tight pulls at the corners and stresses the frame. One that is too loose puddles water in the middle of the top.
Flaws but not dealbreakers: A cover is not a substitute for a dry room. If your basement floods, no fabric fixes that.
The setup workflow
Now the procedure. Do it in this order. Skipping a step is how people end up with a table that is level at one end and square at neither.
Step one: pick the spot and check the floor. You need about 5 feet of clearance behind each end for safe play, more if you have a long reach. Then put a 4-foot level on the floor in both directions. Garage floors slope toward the door by design. A slab that drops an inch across the width of the table will fight you all the way through the leveling step, so find the flattest patch you have before you assemble anything.
Step two: inspect the box before you build. Open the carton, count the hardware against the parts list, and look at the table halves for shipping damage, especially at the corners and along the frame where the hinge plates bolt on. A bent hinge plate cannot be straightened well enough to fold cleanly.
Step three: assemble loose, square, then tighten. This is the mistake I see most. People tighten every bolt as they go, and the frame locks in whatever parallelogram the box gave it. Thread everything finger tight first, measure both diagonals of the frame with a tape, and shift the frame until the two diagonal numbers match. Then tighten, working from the center outward.
Step four: level the table, not the legs. The playing surface should sit 76 cm above the floor, which is the ITTF spec and the number your stroke was built around. Check it at all four corners and at the center of the table, then adjust the feet. If the floor is too far off for the feet to fix, shim under the legs with a hard plastic shim, never a folded towel.
Step five: set the net properly. Net height at the center is 15.25 cm. Measure it in the middle, not at the posts, because a tight net sags in the middle and a sagging net turns a clean clip of the tape into a ball that dribbles over. Tension it until the center holds the measurement, then lock the clamps.
Step six: run the nine-point bounce test. Drop a ball from 30 cm at the four corners, the four edge midpoints, and the center. On a tournament table the ball comes back about 23 cm. What you are looking for is not the exact number, it is the spread. If every point is within a centimeter or so of the others, you have a consistent table. If one corner comes back five centimeters low, check the level there first and the hinge plate second.
Step seven: deal with the folding hardware and the casters. Lubricate the hinge points once a season with a dry lubricant, not oil, because oil collects dust and turns into paste. Check that both locks engage fully and that the locking casters actually lock. I have watched a table roll into a car door, and I have the dent in my memory to prove it. Never fold the table with the net and posts attached.
Step eight: cover it and set a rhythm. Cover the table when it is not in use. Once a month, spend ten minutes: re-check the level, wipe the surface with a damp cloth, look at the hinge plates for play, and re-tension the net. That is the whole maintenance program.
The competition and why it lost
Paddles, robots, and flooring all matter, and none of them belong in this article. If your paddle is a cheap slab of rubber on plywood, a table setup will not save your game, and I send people to specialists for that conversation. Ball machines and club flooring are a different project with a different budget.
Outdoor tables from the other brands are worth a look if you are comparing patio options, and indoor tables in the 18 to 19mm range are what I would buy for a basement where a junior practices seriously. What none of them replace is the procedure above. You can put a tournament-priced table on an unlevel garage floor and it will play worse than an honest mid-priced table that was squared and leveled properly.
What this all costs
The setup itself costs nothing but an afternoon, about 90 minutes the first time. What costs money is the gear: the table, the cover, and a level and a tape measure you may already own. Skip the cover and you pay for it later in surface wear. Skip the leveling and you pay for it every session, in a stroke that does not transfer to a real table.
Do the arithmetic on time instead of dollars. Ten minutes a month is two hours a year. Replacing a table that warped because it sat under a leaking garage ceiling, or because it was stored folded with the net clamped on, is a weekend of assembly and a new box. The two hours wins.
Where this gets hard is expectations. If your kid is practicing for tournaments, a patio table and a club table will feel different, and no amount of leveling changes the material under the ball. Buy the table that matches the room you actually have, set it up properly, and be honest about the ceiling on what it can teach.
That is the job. The table is 10% of your game and 90% of your headaches, and almost every headache is a setup problem you can fix in an afternoon.